Are you ready for the next part of the tutorial? If you missed part 1, go to yesterday's post. Today, we are going to make the mask "pretty" by adding paper to it.

 1. Open your circle mask .png file that you created in the first tutorial. If you do not have the first tutorial (Design a Photo Mask), you can download a copy at my blog.
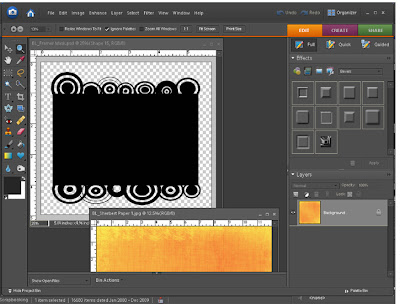 2. Open some paper. I opened Sherbert Paper 1 from my Sherbert kit.
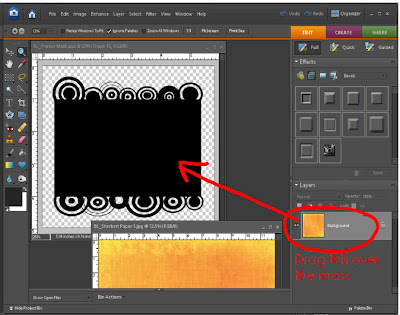 3. Click on the layer that shows the paper and drag it over the circle mask. You should now see the paper only as the mask is underneath it. You should have 2 layers in your layer palette. Close the paper file as you are done with it.
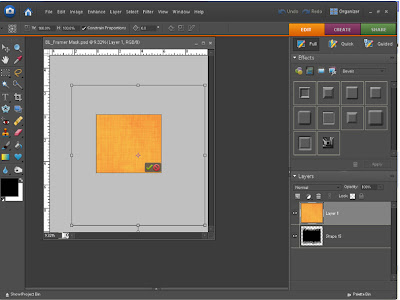 4. Since the paper file is size 12X12 and my mask is much smaller the paper will be too big to show nice detail. In order to show the detail of the paper correctly you need to reduce the paper size to just fit over the mask. You can do this by clicking CTRL + T, then CTRL + 0 (zero). You should see the bounding box. Click on a corner of the box and reduce the size of the paper to just fit over the mask. Click the green check when done.
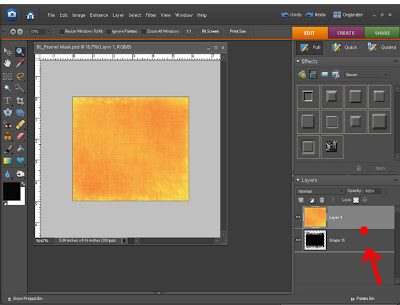 5. We are ready to make a clipping mask now. See the red circle on the screen above? Put your mouse there… between the two layers. Hold the ALT button down. You should see what looks like 2 black circles joined together. Click. You should be able to see your beautiful circle mask now!
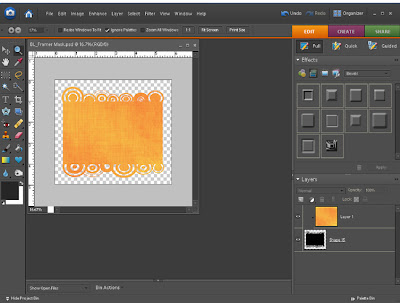 6. Notice what has happened to your layers. The paper layer has moved to the left with an arrow. It has been “clipped” to the layer below. Save as a .png file.
If you liked this tutorial or have any questions, please leave a comment on my blog. Thank you and enjoy! If you want to download a copy of this tutorial in .pdf format, click here. Also, if you want a copy of the circle mask template in .png format, click here.

Circles Mask Tutorial
Also known as Design a Photo Mask- part 2
Also known as Design a Photo Mask- part 2
 1. Open your circle mask .png file that you created in the first tutorial. If you do not have the first tutorial (Design a Photo Mask), you can download a copy at my blog.
 2. Open some paper. I opened Sherbert Paper 1 from my Sherbert kit.
  3. Click on the layer that shows the paper and drag it over the circle mask. You should now see the paper only as the mask is underneath it. You should have 2 layers in your layer palette. Close the paper file as you are done with it.
  4. Since the paper file is size 12X12 and my mask is much smaller the paper will be too big to show nice detail. In order to show the detail of the paper correctly you need to reduce the paper size to just fit over the mask. You can do this by clicking CTRL + T, then CTRL + 0 (zero). You should see the bounding box. Click on a corner of the box and reduce the size of the paper to just fit over the mask. Click the green check when done.
  5. We are ready to make a clipping mask now. See the red circle on the screen above? Put your mouse there… between the two layers. Hold the ALT button down. You should see what looks like 2 black circles joined together. Click. You should be able to see your beautiful circle mask now!
  6. Notice what has happened to your layers. The paper layer has moved to the left with an arrow. It has been “clipped” to the layer below. Save as a .png file.
If you liked this tutorial or have any questions, please leave a comment on my blog. Thank you and enjoy! If you want to download a copy of this tutorial in .pdf format, click here. Also, if you want a copy of the circle mask template in .png format, click here.
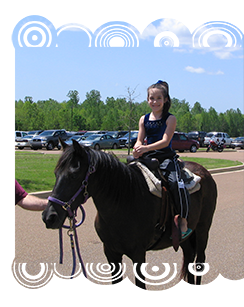
Here's another example of using a photo with the mask. Please note that I cropped the mask to fit the photo.

 1. Start with a New File. I made mine 6 inches in width and 6 inches in height with a 300 resolution. Make the background transparent.
 2. Click on your Shape tool and click on the Rectangle Tool.
 3. Draw a rectangle. Leave some room on the top and bottom as we will be adding to those areas. Simplify the layer. You can do this by clicking on the top bar and clicking “Simplify” or you can right-click on the layer and click “Simplify layer”.
 4. Now we are going to add a design with custom shapes. I will be using Design Circles. You can download these for free from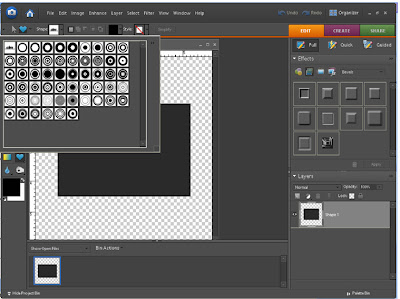

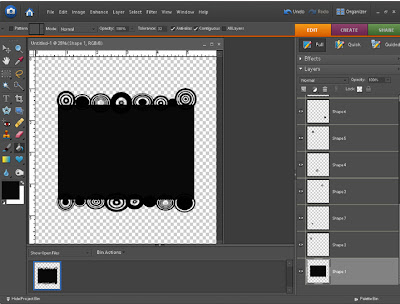 7. Next, merge all layers by right-clicking on the layer palette and clicking “merge visible”.
 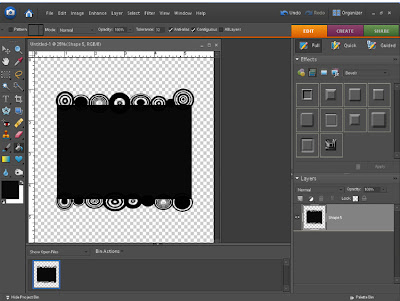 8. Save as a .png file. You have now made a mask template that you can use with hundreds of different papers. I will show you how to use this mask with different papers in the next part of the tutorial.