Thursday, May 28, 2009

Fantabulous Alpha

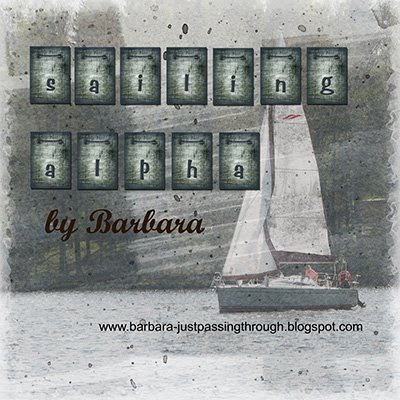
Whew, what a busy week this has been. It has just flown by and I realized that I have not posted the alpha to the Fantabulous kit yet. For some reason, it's been hard for me to get back in the swing of things. Anyway, enjoy this alpha.

Monday, May 25, 2009

Fantabulous Elements

We are finishing school this week and I am ready for a break. It's been raining a lot here lately. My garden is really growing. I have tiny green tomatoes the size of large marbles. Here are the elements to the Fantabulous kit. I haven't had a lot of time so this kit is kind of small but it's the quality, not quantity, right?

Friday, May 22, 2009

Fantabulous Papers

I'm here again. I've been working on a kit I call Fantabulous. It's kind of a simple kit. I hope you can use it. My computer has been giving me problems so my husband wiped the hard drive again. He just did it in March but it was really running slow. Anyway, I'm back up and running now.


Tuesday, May 12, 2009

Beach Papers

We had a great time in Panama City, Florida. We stayed in a condo right on the beach. There was a lot of competition as Katie was competing with gymnasts from 8 states but she did well and we are very proud of her. We went to the beach everyday. The girls enjoyed boogie-boarding and making sand castles. My oldest daughter even made a dolphin sand sculpture. There was quite a bit of noise there as Thunder Beach Bike Week was going on at the same time as we were there. There was an estimated 300,000 bikers there so we heard motorcycles a lot. I took some of my pictures and made a mini-kit of Beach papers for you. I hope you can use these.
On a sad note, Bear never came home.

Monday, May 11, 2009

Back from vacation

Just wanted to let you know that I'm back from Florida. I haven't had a moment to work on any freebies but I am posting a few pictures that I took from our trip. I'll write more about our trip later.

Tuesday, April 28, 2009

Layouts I've done

We're heading to Florida and will be gone a while so I won't be posting as I won't have internet access but I wanted to post a couple of layouts that I made of my youngest.


Credit for resources used: Mandy Stewart-Overlayed Collection

Friday, April 24, 2009

Rain Alpha

Happy Friday to everyone! I'm ready for school to be out. How about you? Today I have for you the alpha for the Rain kit. It's appropriately little rain drops. I hope you like it.


Thursday, April 23, 2009

Broken Link to Animal Prints is repaired

MoosieD let me know that the link to my Animal Prints Papers was broken so I repaired it. I don't know why 4shared does this but I have had this happen more than once. All of my links should be active so if you ever come across one that is broken, please let me know and I will have it repaired.

Rain Elements

My clematis at the mailbox is in full bloom now. I've had 3 neighbors comments on it. I had posted a close-up of the what the flowers looks like a few posts back but I wanted to show you what the whole vine looks like now.

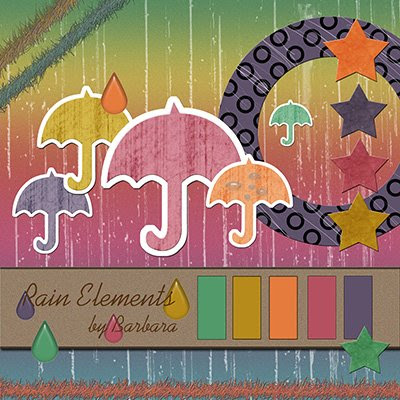
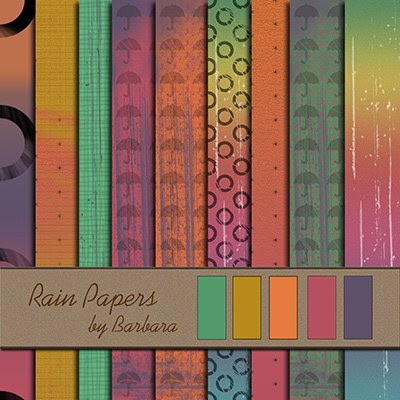
Here's the elements to the Rain kit. I hope you can use them. Have a blessed day!

Wednesday, April 22, 2009

Rain Papers- Part 3

I hope you have been enjoying the Rain papers this week. This is the last download for the papers. If you missed the first two downloads, you can snag those by reading the two previous posts. Thanks to everyone for the encouraging comments about my fur-baby. Still no sign of Bear. It's amazing how much I miss that little gray fur-face. I'm still hoping she makes it home. I covet your prayers so, please, continue to pray for her.

Tuesday, April 21, 2009

Rain Papers - part 2

My daughter and I went and posted "Lost Cat" posters all over the neighborhood yesterday and we asked some children in the neighboring area if they had seen a cat and this little girl said that she had seen a gray cat a couple of days ago go into the sewer underground and she showed us where. My daughter had a couple of friends with her who went to the sewer and called for Bear, our missing cat. We did hear a meow from the sewer but we had no way of getting her. One of my daughter's friends suggested calling the fire department to get her out. I went over to the local fire department and asked if they could help so three firemen came over and lifted the grate and a cat did come out but it was not my Bear. Sadly, she is still missing. We did feel so grateful to the fire department that my daughter made brownies and we took them over to them as a small token of our appreciation. They really are our "heroes"!
Here's the second part to the Rain papers. These papers will be in 3 downloads as the file is so huge. If you missed the first part, you can snag it in yesterday's post. Enjoy your day!

Monday, April 20, 2009

Rain Papers

One of our cats, Bear, has been missing since Thursday. She got out of the house while I was at the gym with my youngest and we haven't seen her since. She used to be an outdoor cat but she had a stroke and nearly died. She got better but she has never been the same cat so we keep her indoors. My youngest is heart-broken as well as the rest of the family. If you think about it, we'd appreciate a prayer for her safe return.

I decided to just start with a new kit without the preview this week. If you like my blog header and sides, I think you will like this kit. It's simply called "Rain". I actually made this kit last year but wanted to wait until this month of April to give it to you. The papers come in 3 parts as the file is big. Today you get the first download. If you want all of the papers, you'll have to come back.

Friday, April 17, 2009

Colorful Grunge Alpha 2

The weeks seem to be flying by. Hubby planted tomato plants today. There's nothing like a fresh home-grown tomato! You'll never want to eat a store-bought tomato again. We also plant cucumbers, summer squash, bell peppers, and cantaloupe. Yum! Here is the 2nd alpha to the Colorful Grunge kit. The cute little basket in the preview is from Granny Art. You should check out her stuff.

Thursday, April 16, 2009

Colorful Grunge Alpha

Just a quick post to give you the alpha to the Colorful Grunge kit. I also just finished another alpha for it today which I will post tomorrow. Have a blessed day!

Wednesday, April 15, 2009

Colorful Grunge Elements

I've received positive comments on this kit so it looks like it's a hit. We've been pretty busy with my youngest at the gym. She is getting ready for Regionals which is in Panama City, Florida so we are making a vacation out of the trip. The girls have only been to Florida once so we are really looking forward to it. For those of you that live in or near Panama City, is there anywhere that we should not miss? Here are the grungy elements for you. Let me know what you think.

Monday, April 13, 2009

Colorful Grunge Papers

I really like grungy digi-stuff and the colors in this kit are some of my favorites so I made a kit that has both! I hope you can use this kit and, of course, I would love to see any layouts that you make. It amazes me how much talent is out there. I want to see it! Come on, you know you have ideas already!

Saturday, April 11, 2009

Colorful Grunge Sneak Preview

I just finished a new kit today and will be starting it this Monday. I wanted to give you a sneak preview so you know what's coming. I'm taking the day off tomorrow to celebrate Jesus, the Risen Savior! Happy Easter to everyone!

Spring has sprung!

It is a beautiful morning here in Mississippi. Flowers are blooming and birds are singing. I took these pictures this morning from my yard. I hope you take a few moments to enjoy all of God's creation. This is the day the LORD has made; let us rejoice and be glad in it. Psalm 118:24

Thursday, April 9, 2009

Embossed Tree Buttons

I was looking through my hard drive and found more odds and ends for you. Today I have some Embossed Tree Buttons. They would work well with the Montana kit. Thanks to everyone who left me those encouraging comments regarding the tutorials. I'll try to make some more.

Tuesday, April 7, 2009

Tutorial- Design a Mask (part 2)

Are you ready for the next part of the tutorial? If you missed part 1, go to yesterday's post. Today, we are going to make the mask "pretty" by adding paper to it.

Circles Mask Tutorial
Also known as Design a Photo Mask- part 2

1. Open your circle mask .png file that you created in the first tutorial. If you do not have the first tutorial (Design a Photo Mask), you can download a copy at my blog.

2. Open some paper. I opened Sherbert Paper 1 from my Sherbert kit.

3. Click on the layer that shows the paper and drag it over the circle mask. You should now see the paper only as the mask is underneath it. You should have 2 layers in your layer palette. Close the paper file as you are done with it.

4. Since the paper file is size 12X12 and my mask is much smaller the paper will be too big to show nice detail. In order to show the detail of the paper correctly you need to reduce the paper size to just fit over the mask. You can do this by clicking CTRL + T, then CTRL + 0 (zero). You should see the bounding box. Click on a corner of the box and reduce the size of the paper to just fit over the mask. Click the green check when done.

5. We are ready to make a clipping mask now. See the red circle on the screen above? Put your mouse there… between the two layers. Hold the ALT button down. You should see what looks like 2 black circles joined together. Click. You should be able to see your beautiful circle mask now!

6. Notice what has happened to your layers. The paper layer has moved to the left with an arrow. It has been “clipped” to the layer below. Save as a .png file.

If you liked this tutorial or have any questions, please leave a comment on my blog. Thank you and enjoy! If you want to download a copy of this tutorial in .pdf format, click
here. Also, if you want a copy of the circle mask template in .png format, click here.

Here's another example of using a photo with the mask. Please note that I cropped the mask to fit the photo.

Monday, April 6, 2009

Question regarding the "Designing a Mask" Tutorial

Tiffany asked a great question regarding the tutorial on Designing a Mask. She asked if you really needed to simplify. The answer is NO. The reason you don't need to simplify each layer is, at the end, when you merge all the layers together, it simplifies itself. Thanks, Tiffany, for asking that question. You have saved us from having to simplify each step!

Tutorial - Designing a Mask

Michelle wanted to know how to create a mask after she saw it in a layout so I thought I would show you how to design a simple mask. This tutorial will be in two parts. Here is the first part.

Design a Photo Mask Using Photoshop Elements 6.0 1. Start with a New File. I made mine 6 inches in width and 6 inches in height with a 300 resolution. Make the background transparent.
2. Click on your Shape tool and click on the Rectangle Tool.
3. Draw a rectangle. Leave some room on the top and bottom as we will be adding to those areas. Simplify the layer. You can do this by clicking on the top bar and clicking “Simplify” or you can right-click on the layer and click “Simplify layer”.
4. Now we are going to add a design with custom shapes. I will be using Design Circles. You can download these for free from
http://allsilhouettes.com/design-circles/.

5. Pick a circle shape that you like and add it to the top of your rectangle.
6. Keep adding random circles to the top and bottom of your rectangle. Simplify each layer. When you are done, it should look something like this. 
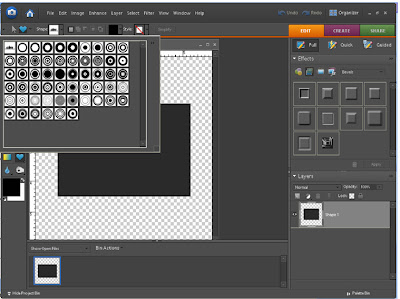
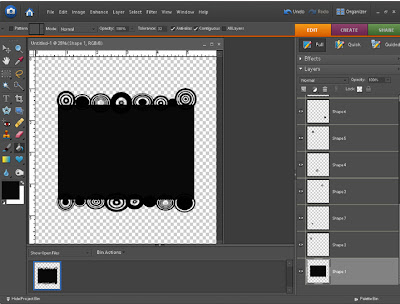
7. Next, merge all layers by right-clicking on the layer palette and clicking “merge visible”. 
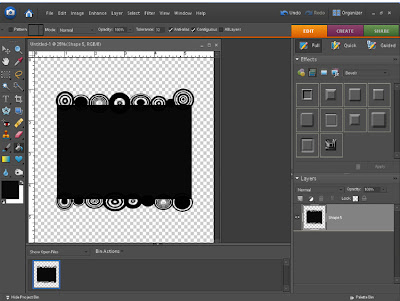
8. Save as a .png file. You have now made a mask template that you can use with hundreds of different papers. I will show you how to use this mask with different papers in the next part of the tutorial.

If you have enjoyed this tutorial or learned anything from it, please take a moment to leave a comment on my blog. I really appreciate it! If you would like to download this tutorial in a .pdf format, click
here. Also, if you would like the circle template in .png format, click here.

Saturday, April 4, 2009

Sailing Mini-Kit Alpha

Warm weather is upon us. I hear lawn mowers going, birds chirping, and children outside playing. Spring has arrived here. Do you feel it in your neck of the woods? Here is the alpha for the Sailing Mini-Kit. I made it with the water from one of the photos. Do you prefer Capital letters, small letters, or both in an alpha? By the way, I sure am enjoying the comments that you'll are leaving on my blog and on 4shared. It really keeps me motivated to design more freebies!


Friday, April 3, 2009

Sailing Mini-Kit Elements

Just a quick post to give you the elements to the Sailing Mini-Kit. This looks like the same preview as yesterday because it is but the link will be for the elements. If you missed the papers, go to yesterday's post for the papers. The alpha will be next.

Thursday, April 2, 2009

Sailing Mini-Kit Papers

I have for you today a Sailing Mini-Kit that I made at the request of Lindsay. She even sent me some photos and gave me permission to use them in the kit. This preview shows the papers and the elements together but today's download will be for the papers only. I will post the link for the elements tomorrow although it will look like the same preview. I call this one a mini-kit as there are not many elements to it. I know nil about sailing so please be kind. I made the wheel from scratch and, of course, I had to make some buttons. Hope you can use this.


Wednesday, April 1, 2009

Animal Prints Alpha

I got quite a few comments about this kit. Apparently a lot of you go to the zoo and have pictures so I'm anticipating seeing all of the beautiful layouts that will be done. Here is the alpha to the Animal Prints kit. The zebra stripes are "actual" zebra stripes from a photo that I took. Have a blessed day.

Tuesday, March 31, 2009

Animal Prints Elements

Are you ready for the elements to the Animal Prints kit? The frames I made for this kit are attached in one element but you can easily adjust this with the good ole' eraser tool or a layer mask. Just erase what you don't want. I would love to see some zoo layouts.

Monday, March 30, 2009

Animal Prints Layout

Just a quick post to show you a layout that I made with the Animal Prints kit. I'll have the elements for you tomorrow.

Animal Prints Papers

Happy Monday. Today we start with a new kit that I had a lot of fun making. I actually made some of the papers and elements from actual pictures that I took at the San Diego Zoo and the Wild Animal Park. If you are new to my blog, when I start a new kit, I usually give the papers first, followed by the elements, then the alpha. If you don't want to miss any freebies you may want to sign up on the right. That way you will get an e-mail when I post. I am working on another tutorial. I noticed that Michelle wanted to know how to do the frame that was posted in a Sherbert layout ( a few posts ago) so I thought I would do a tutorial on that. Also, Lindsay requested a Sailing themed kit so I'm working on that as well. I hope you have a great day today. I will leave you with a thought: There is no one keeping you from being more with God than you!

Friday, March 27, 2009

Animal Prints Sneak Preview

Are you ready for the weekend? I know I am. I am ready to just "veg out". This week seemed non-stop for me. I have been working on a new kit and just finished it. If you have any zoo pictures you may want to snag this kit. It's called "Animals Prints" and here is a sneak peak for you.

Thursday, March 26, 2009

Camo Alpha

As I am doing my Spring cleaning on my hard drive, I found another items that you might be able to use. It's a Camo Alpha. This would obviously be good for military but hunters and boys might find it useful also. Enjoy the day.

Wednesday, March 25, 2009

More Odds and Ends

I made these buttons quite some time ago but I thought maybe someone could use them. You know how I love to make buttons! Enjoy.