
Design a Photo Mask Using Photoshop Elements 6.0  1. Start with a New File. I made mine 6 inches in width and 6 inches in height with a 300 resolution. Make the background transparent.
1. Start with a New File. I made mine 6 inches in width and 6 inches in height with a 300 resolution. Make the background transparent. 2. Click on your Shape tool and click on the Rectangle Tool.
 3. Draw a rectangle. Leave some room on the top and bottom as we will be adding to those areas. Simplify the layer. You can do this by clicking on the top bar and clicking “Simplify” or you can right-click on the layer and click “Simplify layer”.
 4. Now we are going to add a design with custom shapes. I will be using Design Circles. You can download these for free from http://allsilhouettes.com/design-circles/.
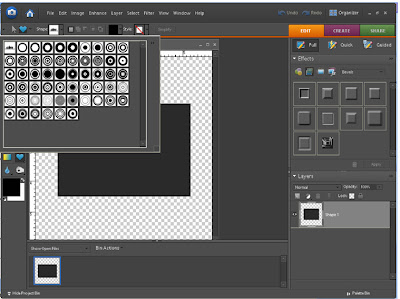
5. Pick a circle shape that you like and add it to the top of your rectangle.
6. Keep adding random circles to the top and bottom of your rectangle. Simplify each layer. When you are done, it should look something like this. 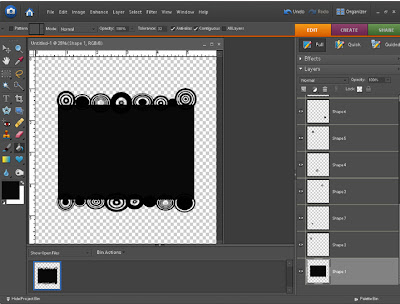 7. Next, merge all layers by right-clicking on the layer palette and clicking “merge visible”.
 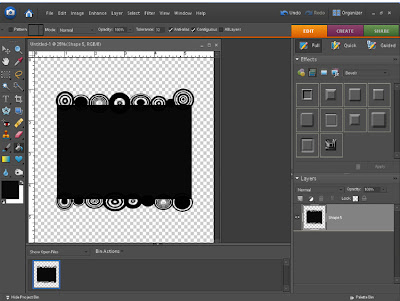 8. Save as a .png file. You have now made a mask template that you can use with hundreds of different papers. I will show you how to use this mask with different papers in the next part of the tutorial.
If you have enjoyed this tutorial or learned anything from it, please take a moment to leave a comment on my blog. I really appreciate it! If you would like to download this tutorial in a .pdf format, click here. Also, if you would like the circle template in .png format, click here.


11 comments:
Thank you for another great tutorial and thank you so much for making a pdf file to download.
Hi Barbara - You are the natural teacher! It is ironic - I know these tings, but just have not totally connected it to designing. I have created name masks... and they are fun. For now I will just play with the stuff from others. Actually, I won't even get to much of that. I have quite a task still at hand... so it is back to Photoshop, Creative Memories, & Inkubook for me!!!! Wish me luck. My pages should be getting less labor intense soon. The ancestor ones take a really long time.
It is supposed to be nice for a few more days... we may even get to BBQ - me... it is the computer... but I do take breaks to enjoy the sunshine.
Big "sunny" hugs!!!
eila
Thank you so much for the tutorial!! I'm not a designer, so it's great to learn 'how did they do that?'. Can't wait to try it out. And thank you so very much for taking the time to make a pdf file!! Hugs!
I liked the tutorial, I do wonder though? Why do you simplify it? Do you have to?
Thanks for the tutorial! I really appreciate it!!!! I bookmarked it to come back and try it soon!!! :-)
Thanks for showing us this! I have wanted to know for a long time =) Again, thank you!
Thank you for this tutorial. You made it seem so straightforward.
Marie
Thank you for the great tutorial. It is always such a welcome relief when I see a tutorial for PSE 6. Thanks also for the pdf file.
oh, this is so sweet of you to do for us. thank you so much.
Yes, I learned very much! Thank you!
How did you know that I've been fighting with my computer all day trying to teach myself how to make these masks. I decided to take a break and check out CBH's freebie finds and here you are, a life saver.
Thank you!!!
Post a Comment