
Nanascraps requested a tutorial for the "acrylic look" that I used in making the Sherbert Alpha 1. Since I recently learned from Eila how to save a screen shot, I thought I would give it a try. Please note that this is my first tutorial ever so please bear with me.
“Acrylic Look” Tutorial Using Photoshop Elements 6.0
1. Start with a New File. I start with 12 inches in width and 12 inches in height, with a 300 resolution. Make your background Transparent.
1. Start with a New File. I start with 12 inches in width and 12 inches in height, with a 300 resolution. Make your background Transparent.
 2. Next, with your Type Tool, type a word. It doesn’t matter what color you use as we are going to change it later. Make the text big enough to see. I used 150 pt.
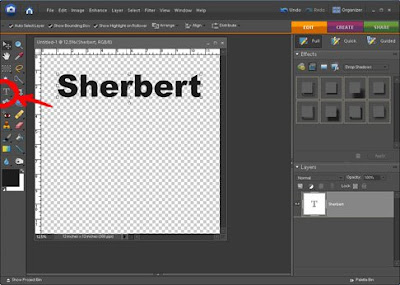 3. Next, open up a paper that you want the text to look like. I opened Sherbert Paper 5 from my Sherbert kit. Now drag the paper layer over to the text. You should now have two layers and should not be able to see your text as it is under the paper. (You can close the paper file as we are done with it.)
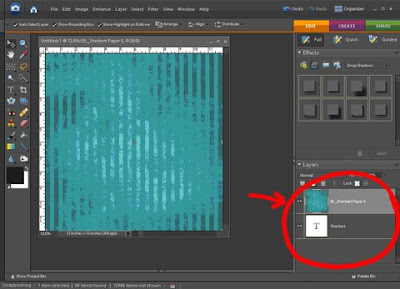 4. Now, this is a tricky part if you have never done this before. We are going to make a clipping mask. Do you see where the red dot is on the screen below? Put your mouse there… right between the two layers. Hold the ALT button down. You should see what looks like 2 black circles joined together. Click. You should be able to see the text now but it has changed to look like the paper. Cool, huh! Notice what has happened to your layers. The paper layer has moved to the left with an arrow. That means it has been “clipped” to the layer below.
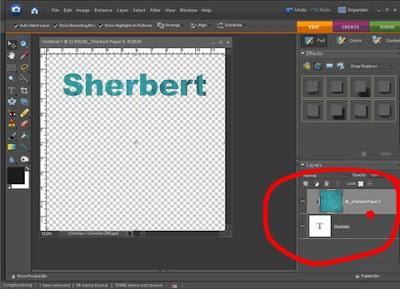 5. Next, merge the two layers together. Do this by right-clicking on the top layer (see red circle below) and click merge down. You should just have one layer now.
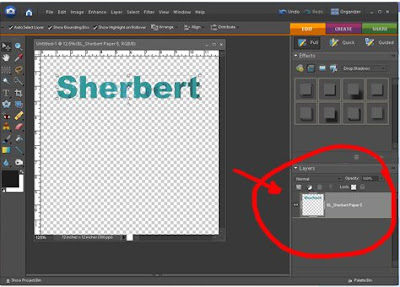 6. We will now work on a simple way to make your text (or any shape) look like it has an “acrylic” look. Click on your style button (circled in red), then click on the pull-down menu (circled in red on the right) and go down to “Glass Buttons”. If you are using Photoshop Elements, you should have this. Click on “Translucent Glass. (see red arrow below).
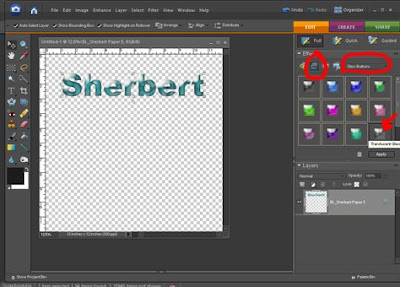 7. We are not done yet. Duplicate the layer. I do this by dragging the layer to the little square icon right above it. You can also copy the layer by hitting CTRL
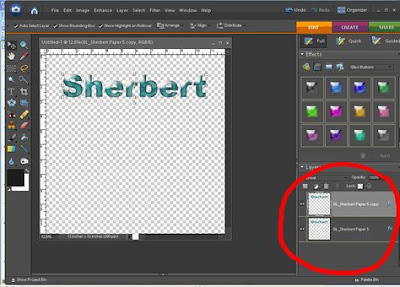
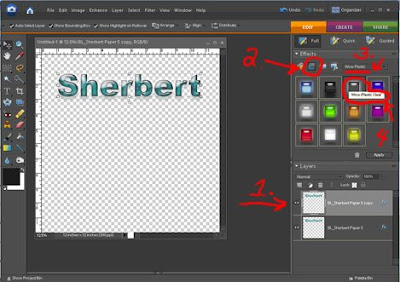
8. Make sure the top layer is highlighted (see no. 1 below). Click on the “Glass button” style at the top and go down to Wow-Plastic. Click on Wow-Plastic Clear.
 9. Your text should now look like it has an acrylic look. I like to clean it up a bit so I click on the little blue FX icon on the top layer.
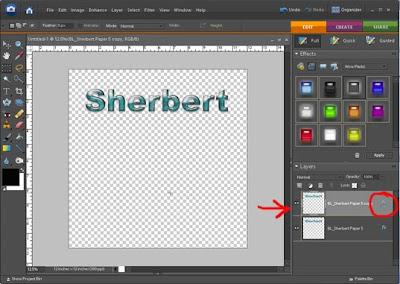
10. Adjust the levels to your liking. There you have it!

TIP: If you want a clear “see-through” text, skip step 7 only. Do not duplicate the layer.
If you liked this tutorial or if anything is unclear, I would love to hear from you.
Oh, if you would like a .pdf file of this tutorial for your records, you can download it here. Thanks and enjoy!


7 comments:
Thank you so much for the tutorial. What I liked the best is that you had a pdf file for us to download. Thank you for that also. I am always looking for tutorials.
somebody LIKES the ease of screen shots. I hear from a friend that they can be done through Picasa, which is free online... it's a photo share/ edit program I think...Me, I am just happy to know there is a way.
The really ironic thing? My son who is a serious genius. REALLY computer savvy. He was writing programs in DOS when he was 6... (1980s) smart... said he just figured out the screen shot thing a couple weeks ago too. TOO FUNNY!
Thanks for the tut... I think you are a natural born teacher - a reason home school is such a great idea for your girls. I guess screen shots could help with that too...
Hugs Lady,
eila
Thank you so much for this Freebie. I want to let you know that I posted a link to your blog in Creative Busy Hands Scrapbook Freebies Search List, under the Uncategorized post on Mar. 23, 2009. Thanks again.
I have picasa and it is not the photo shop elements. You can edit photos and upload it to your blog, You-tube and make a movie. THe only thing with Picasa is different from Window Movie Media and you can't put music in it. Maybe if there is an upgraded verson. I just played it tonight and it was a little differnt from Adobe photo shop and HP. THOught I let these followers know. I wish I have this program(Someday). Have a good week and thanks for the tutorial. Nancy
Thank you for the tutorial and double thanks for including a pdf file!! I'd never remember this! Hugs!
Thanks for the wonderful tut and the great screen shots. Very much appreciated.
This was an excellent tut - easy and straightforward, many thanks!!
Post a Comment